
So I have taken back to riding quite seriously in the last couple of years, and aside from weather and life getting in the way a bit this last winter I have kept to it quite well - I even upgraded my bike from an old faithful but about to disintegrate (literally, so much was broken on that bike) to a brand new shiny bike that has extended my rides with comfort and speed potential. So since upgrading my bike and breaking out further and further into the world (as well as taking on a cycling challenge or two), I have found a few things that really upgraded my experience and I think everyone should consider them, especially if you have been riding your bike as it came out the box without any tweaks - a few upgrades here and there can really make the difference. They don't have to be extortionately expensive, there are typically options for all price points so if you aren't too sure you can always try something more affordable and upgrade in the future. Most items on a bike should be considered consumable as they will eventually wear out, so you could always wait until the factory equivalents of these wear out before you upgrade...
Better pedals
My Upgrade: DMR V12 Mg
You may not know this until you experience something different, but you know the plastic pedals almost all brand-new bikes ship with? They are genuinely awful. Occasionally bikes will ship with a more reasonable set of metal pedals, but there is a lot of variation in pedals and not all are built equal. Above everything, if you are riding plastic pedals then this is perhaps the most important upgrade you will make, every plastic pedal I have ever ridden has nothing to really keep your foot in place, and if they get wet? Absolute nightmare, so let us get you onto something a bit more reliable.
Firstly, you need to decide if you wish to run a platform or clipless pedal - for those unfamiliar, 'clipless' are the ones you clip into, a poor naming convention that came about because clipped pedals are the kind with a strap that goes over the top of the shoe, hence 'clipless' only having the clip in part of the bottom. If you are likely to get off your bike and walk around a lot then platform pedals are likely to be preferable, but if you are going to be focused purely on the riding and want a little extra security then clipless may well be for you.
As I went for platforms (or 'flats') then the advice is simple - make sure you get a good-sized pedal to match your foot side, I'm broad footed so a bigger pedal was a bit of a must and I wanted to make sure they have decent pins/grub screws/point sets (whatever you want to call them). Every good flat pedal will have these little pins sticking up out of them, and you will want a set of pedals with plenty of these pins that all sit up nice and proud of the pedal surface as these are what hook into the tread of your shoes and keep your feet planted. The DMR set I went for seriously grabs the bottom of any shoe I wear, really good flat pedals should keep you in place really well and these are no joke in that department. Would I recommend that particular set of pedals? Well, the Magnesium set I bought were on the pricier side and the paint lasted about 30 seconds out of the box, but I don't mind the battle-worn look and they have been unquestionably exceptional for keeping my feet in place, so I would recommend them but maybe look into the non-magnesium ones if the finish is something you want to keep pristine for longer. Installation was easy, thread the old pedals off and thread the new ones on - just remember that your pedals go on a specific side and one side of your pedals will likely be counter-threaded.


Your shoes are also important, you can get cycling-specific shoes but as long as you are rocking a decently deep tread (or in the case of clipless pedals, corresponding clipless shoes) you will be fine. At some point, I may grab some mountain bike-specific shoes, but I like to jump off and wander around from time to time, so I split the difference with some Trail Runners. I think this is one area you can save some money, if you are running flat pedals just experiment with the shoes you already own, if one of them hooks on nicely then great! Stick with those for your riding.
Better tyres (& tubeless!)
My Upgrade: Maxxis Minion DHR II/DHF | Stan's Sealant | Muc-off Tubeless Rim Tape | Muc-off Presta Valves
Perhaps the most important component, getting your tyres right is essential - ultimately, if things are going well your tyres are the only thing touching the ground and can drastically change the feel of your bike. I have ridden many combinations of tyres over the years, my old bike in fact was a bit of a mullet in terms of style, with a proper mud tyre on the back and more of an all-terrain on the front, but it rode great on all surfaces so sometimes a bit of experimentation is good. All that being said, I knew I was going tubeless with my new bike - having sustained at least 1 puncture a fortnight that needed patching and at least 1 puncture a month that required a tube replacement, I was sick of it and willing to try anything.
My bike shipped pre-taped with 'tubeless ready' rims, and tyres that were questionably tubeless ready (they shipped with a brand that made tubeless tyres, but according to the internet they made variants which were not tubeless), but I hadn't loved the stock tyres anyway as I had found them a little slippy and even a little unstable at times. My research took me down the same route most end up going - Maxxis Minions are kind of the gold standard online for tyres, and if you ride the rough stuff and don't know where to go with your tyres, My experience has been brilliant and I fully recommend the Minion setup. DHF on the front and DHR II on the rear is the go-to configuration (Maxxis themselves even recommend this set-up when looking at the product pages), and with that purchase made along with some Stan's Sealant, Rim Tape and tubeless valves, I was ready to go.

The process of switching to tubeless is easier than you might think, and all in I spent about 10 minutes a tyre even with my inexperience. There are plenty of videos online about this, but the short version: take the wheel off the bike, remove the old tyre & tube, run the tape around the inner rim as clean as you can, bodge a hole in the right place and put your new valves in (My Muc-off Presta valves came with a couple of options for bases to make the best seal against the rim, pick whichever suits the profile of your rim), fit your new tyre on one of the beads, pour in the appropriate amount of sealant into the bottom of the tyre, push the second bead in and inflate until it pops into place then spin the tyre around a few times to circulate the sealant along the bead to fix any gaps. That is the simple version, but there are some things you can do to make it even easier: put soapy water along the beads to make them seat easier, throw down some old towels and rags so you don't have to worry about spills, either enlist a second person to hold the wheel or make a hanger for your tyre and use an electric tyre compressor to set the bead (It is just easier when you are trying not to spill sealant everywhere).
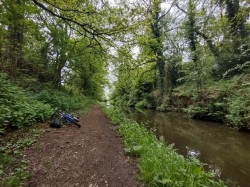
With that, I am tubeless with a shiny set of Maxxis tyres. The tyres fixed all of the handling complaints I had about the old tyres, they perform well in all conditions but shine most on the winter muddy towpaths along the canals - my old rubber would bog and become a mud wheel as it built up between and eventually over the tread pattern, but these wick the mud away effortlessly. All that being said, the real star of the show is the tubeless set-up: I will never go back to inner tubes. As someone who was constantly having his rides ruined by the thorny bushes that line those aforementioned towpaths, now I ride with confidence, quite literally pulling thorns out when they rear their ugly head, only to watch a little fizzle of air and sealant spit out before the puncture disappears forever, I absolutely love it!
Dropper Post
My Upgrade: Brand-X Ascend Dropper 125
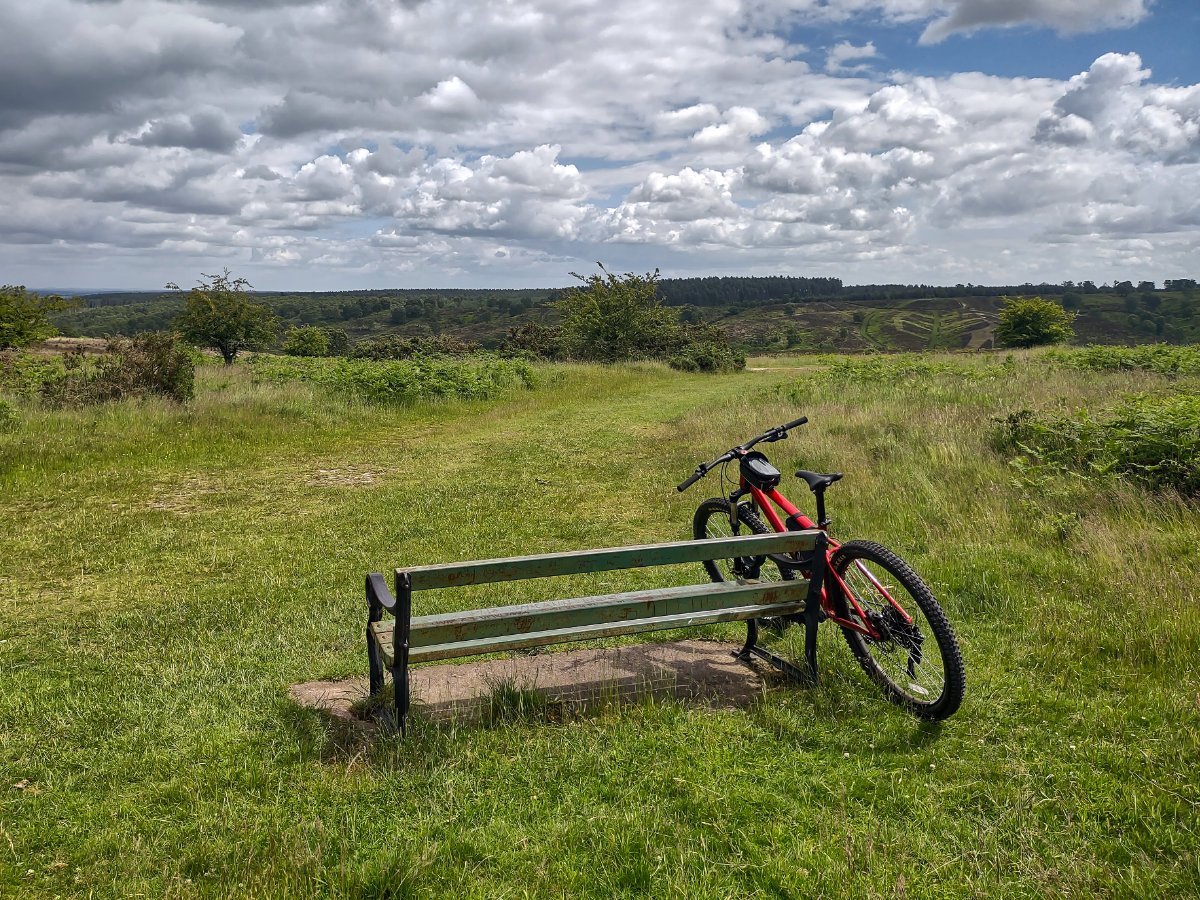
I'll be honest, I knew very little of dropper posts before my last bike upgrade, a few bikes in my price point came with a dropper, but my Vitus Nucleus VRS didn't. I wasn't too disappointed at this fact, considering on my old bike I had been much more of an all-terrain XC rider, needing a mix of all disciplines to hit all the different terrains I would encounter but only occasionally dealing with rough trails. With the advent of my new bike, however, my range expanded quite literally and I was finding myself in rougher and rougher terrain. One day I had rode all the way to the Chase and was exploring some unmarked trails around the place while making my way deeper into the woods and heathlands that make the Chase beautiful. Having made my way down a winding path I was greeted by a surprise drop, probably only 2-3 feet at best but enough to warrant leaning back - so that is naturally what I did, and, nothing happened. The inner seam of my cycling trousers had managed to hook along the saddle and I was stuck upright going off a drop. I landed very nose heavy, and to avoid a face plant I threw myself sideways onto my shoulder, leaving me with a nice ocular migraine and mild concussion that meant I spent the rest of my Saturday vomiting and fighting sleep.
What is the point of that story? Well, a dropper post would have saved my bacon for sure. If you are unfamiliar, a dropper post replaces your saddle post with a mechanism that is essentially what you find under an office chair. It gives you a lever close to hand that can quickly raise and drop your saddle, so at the start of a downhill run you can drop the saddle out of the way and avoid sharing my fate above. Droppers can be expensive, but Brand-X seems to be a really nice middle ground between a well-known and trusted name that doesn't break the bank. I ride quite a large bike, so the 125mm was enough to drop for my riding position, but if you ride a smaller frame with your saddle set higher then you can spend the money to go to some really long posts (just make sure your frame can support it). You can always ride a smaller dropper, as they can sit proud of the frame as needed. for me, 125mm is actually perfect for getting the saddle out of the way and events like above should be a thing of the past.

If you ride downhill and the rough stuff even occasionally then I think a dropper is a great upgrade, yes you can pull over, undo the clamp that holds your seat, wiggle the post fighting the dirt and grime built up on it until it goes down and then reverse the process at the bottom, but inconveniences like that tend to breed laziness (I know I never did that before a trail, I had practised leaning back over the top of the saddle and thought that was enough). If you are shopping for a dropper, you need to know what kind of dropper your seat post can support, as well as if your bike supports internal routing or if it needs an external dropper. I would be surprised if you can't find this information online, but if you need to work that out yourself then you will need to measure the diameter of your seat post, the length of the post (only the straight part, if your seat post curves in any way you must stop there) and then check underneath for openings that would allow cables inside the frame (see the photos below). Installation is as simple as taking the old seat-post out, running the cable and putting the dropper in ideally with a bit of grease to make future maintenance easier.
Storage bags
My Upgrade: Just a generic frame bag, plus in winter I ride with a top-mounted bar bag to keep my phone dry
This last one is less of an upgrade per se, but it is certainly going to upgrade your riding experience. Unless you take a completely carefree approach to riding you have likely amassed somewhat of a collection of essentials for your ride - hopefully, you have already figured out a bottle cage (or for longer rides, a hydration pack) is the easiest way to move the essential fluids with you, but what about all the odds and ends? The puncture repair kits? The spare inner tubes? The little tools and multi-tools that can bail you out in a pinch? A lot of riders have taken to the bum bag for their tool and trinket collection, which is a fair option, but if I can I like to let my bike do the carrying - enter the frame bag. Admittedly, the frame bag options may be a little more limited for those rocking full-suspension setups (though there are still options) but for those of us on hardtails, there is a great wealth of real estate between those tubes just begging to be used up. Get it strapped into place, chuck your tools and repair kits in plus an emergency snack and you are well away without having to add any extras to your person.
The frame bag is a bit of a no-brainer in my eyes, especially if you ride long distances, and if like me you often ride into the unknown then keeping a sat-nav visible up front is also a bit of an essential. Rather than splurging on a dedicated GPS unit, I like to keep my already capable GPS unit, my phone, accessible somewhere up front. In the summer I run a simple phone mount but for the times the weather turns I like a little handlebar bag that has a bit of storage as well as a nice waterproof pocket for the phone - the plastic cover is capacitive so I can still use the screen, but heavy downpours won't end up killing my phone (yes, I have unfortunately lost a phone to riding in the rain). I have tried a different type of phone bag that straps to the frame rather than mounts to the bars, but not only is that a worse viewing angle but it constantly hit my knees on climbs and even left a couple of nice scratches on my frame thanks to that particular model being unwilling to sit still.
Storage can go far beyond what I have mentioned here, those familiar with bike-packing can really stock themselves up using panniers, saddle-mounted bags (if you go this route, make sure its compatible with your dropper set-up) as well as big handlebar bags that combine to give you enough room for everything including the kitchen sink!
So that is my rundown of the 4 things that improved my bike substantially from how it rolled off of the factory floor, obviously, this list is very mountain bike focused but for those of you aiming to roll across the rough stuff, I do view these improvements as pretty vital. They certainly left me a happier rider, capable of riding further and over more difficult terrain, and all of this was achieved without really breaking the bank - a tough thing to do in a hobby that lends itself well to ridiculous price tags. That being said, a hobby like cycling is iterative, and my last recommendation is to ride the rides you wish to ride, that way you can find the parts of the bike you need to upgrade personally and really make your bike your own.