This is travel diaries, a series where I tell the story of a recent trip and all of its trials and tribulations. This travel diary is almost the antithesis of a travel diary, as it involves little travel beyond the driveway, but this is an essential part of the story in getting us back on the road. A looming bit of work on the Jeep had finally come due, but it lead to far more problems than originally expected...
How it all began
As with many vehicular problems, today's story begins with an MOT - three MOTs to be precise. My mechanic has always been fair when it comes to work, he's a busy man and doesn't need extra work so if a job doesn't need doing, he won't do it. An advisory popped up on the Jeep a few years back for a rusty Universal Joint (or UJ, which I will be using going forward - it's the end of the shafts that connect to the wheels, most cars have CV joints in the place the Jeep has UJs), in year one he told me he had to note it down but to just monitor it to see if it progresses. As I didn't do too many miles per year, it wasn't of much concern. Year 2 came and went with little more than another note on the MOT slip, but by year 3, while still an advisory, he finally told me it was time to get it done as it was about to become a real problem. I had planned to get it done sooner but really struggled to source replacement shafts for the Jeep in the UK, with shipping from the US for such a bulky part being astronomical, but following my mechanic's recommendation I got in touch with a refurbishment shop nearby who could get the shaft and its crusty joints shining and spinning smoothly again. With a plan made, I dropped the Jeep off with my mechanic, he pulled the shaft and I shipped it up to the refurb shop, a day later I picked it up with them having done a brilliant job and the following day I was driving away in a now MOT-approved motor.
Things were good, the clicks of a crusty shaft had disappeared and things were rolling smoothly, I even took a mini-road trip out to the stunning stretch of the River Severn for a beautiful bike ride on a sunny early April day. On return, I had noticed some splash marks up the tires and wet patches under the car, while that day had been dry the previous ones hadn't been, so I chalked it up to a few splashes into puddles and settled in for the night. But sometimes, things just nag at you, you know? That little pang of intuition that just won't go away - sure there had been a few puddles, but the roads were damp, hardly enough to leave splash marks as well as a puddle on the driveway. As I locked up that evening just before heading to bed, I took a detour down the driveway to inspect the Jeep - not only were the puddle and splash marks still there, but they smelt something foul...

Out with the old, in with the new (problems to deal with)
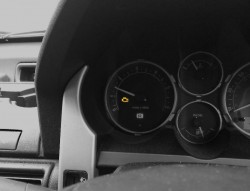
Under the glow of the morning sun, I was able to get a better look at the situation, a greyish viscous liquid around the fresh UJ, splattered all around the tire and arch and drips down onto the floor. The smell was vile, I say that as someone who loves the smell of petrol, diesel and motor oil but this hit the back of the throat/in the nose and clung there in an almost nauseating way. I thought It was possible that my mechanic had used some kind of lubricant to seat the reconditioned shaft, but this seemed like far too much for such a situation. That being said, the smell too was strangely familiar. Many years ago I had worked for an automotive company, and many years before that I had worked in its driveline division; no matter how many years had passed, the smell of the shop floor of the driveline factory was etched in my memory, and it smelt just like this leak. A quick call to my Dad, who had worked most of his life in and around that same factory, and he was pretty certain from my description that it was gear oil coming out of the front differential.
Before we go and for those unfamiliar, in the simplest of terms, a differential does two things - its core purpose is to take the rotations coming out of the gearbox and send it down the shafts to make the wheels spin, but more specifically to a differential, it allows the wheels to rotate at different speeds, which is important for when cornering, as your inner wheel spins slower than your outer one. Basically, a differential is a box of gears, that do a lot of spinning - they like to be well lubricated, and like to explode or friction weld themselves stuck without lubrication. If you're curious, here is a clip from Garage 54 running a differential dry to see how it would hold up:
So things weren't looking too peachy, but in doing some research I knew a few things about the differential in the Jeep, with the most important being that when you fill the differential with oil to the correct spec it sits below the fill hole/shaft tube, so as long as the car wasn't moving the oil would sit below the seals and it shouldn't loose any more fluid. I also knew that, on a car of this age, it was pretty likely the rubber seal had hardened and cracked during the shaft replacement, almost inevitable for a 20+-year-old bit of rubber, so it was likely inevitable when removing the shaft. All I had to do was order a replacement seal (well, two replacement seals, if one is gone the other is probably not too far behind) limp it to my mechanic so he could swap it in and all would be well.
Nothing is ever that simple
A few hours after having dropped off the car, I get a call to let me know he wouldn't be able to do the job. I drive down and after having a chat with a couple of the guys it seems they were expecting an outer seal they could tap in down the axle tube, but the seals on the Jeep's differential were mounted from the inside requiring skills and tools they did not have. Something about setting the backlash correctly, shims and a bunch of other things that meant nothing to me - I am reasonably mechanically knowledgeable, and not afraid to give things a go, but differentials are just one of those things that do give me pause for thought. Not one to bring a problem without at least one possible solution, he gave me the name of a nearby gearbox, differential and driveshaft specialist who he felt certain could help, as well as topping the differential back up so I wouldn't have to worry on the short drive over. Unfortunately, they were a little wet about the whole thing, telling me they wouldn't be able to help until "at least May", not even asking for a booking while they thumbed through an empty diary, I drove home with their card in hand and little more than a non-committal "give us a call then".
Oh well, who cares right? I live within a stone's throw of one of the more dense urban areas of the UK, and one thing it is not short of is industrial estates lined with mechanics. I had a chat with a couple of typical back road mechanics, who mostly gave me the same "oh no, can't do differentials, no thanks" before suggesting I talk to various specialists they could recommend. While I was going through the phonebook, my Dad had been researching the job and came to me with an enthusiastic "We can do this" - again, I freely admit to being a little scared of working on diffs, even more so considering every mechanic seemed to be scared of them too. So I continued down the rabbit hole of specialists and, from here, found myself on one of the most utterly befuddling hunts for a mechanic I have ever experienced: mechanics who can't do anything with differentials besides maybe take them out and ship them to specialists, those same differential specialists who can't source parts and can't/won't deal with Jeeps, gearbox specialists who can't do anything with differentials, 4x4 specialists who "really only do Land Rovers". I spoke to one 4x4 specialist, who had custom-built Dakar-looking beasts with tubular frames and insane-looking rock crawler-style monsters who apparently "would not know where to begin" with my differential leak. It was starting to feel, frankly, a little pathetic - ultimately I drive a Jeep, I know it's an unusual thing on these isles but it's still just a car, and being a Jeep I'm likely going to need periodic work so if I can find one competent mechanic, at least one not scared of a bit of the unknown, then I would have been a loyal customer for life.
It was around this time my Dad gave me another poke, "Just watch this video, we can do this". I watched the video. We can do this, and I sure as sh*t wasn't going to waste any more of my time talking to any more so-called "specialists".
When all else fails, DIY
A few different videos made it look pretty damn straightforward, we settled on the video below by Smokin Monkey which has them bashing the job out in an afternoon - we made no presumptions about our ability to do the job in any sort of timeframe, and as I had access to other cars, assumed the Jeep would be out of action for a while (not like I would really want to drive it knowing the diff is slowly emptying itself each time). A massive thank you goes out to Smokin Monkey, and just about anyone who makes these kinds of guides and puts them out online, they are such an invaluable piece of the internet - between the prep and watching each step while under the car I must have put about a hundred views on this video and without it, I would have never been convinced to even attempt the job...
For those that stumble here from the world wide web, this article is the story of how we repaired the differential seals on a Dana 30 front end for a Jeep Wrangler, but it isn't a how-to - if you happen upon this story and are looking for more of a guide then watch the video above for a much more concise step-by-step run through.
I had most parts lined up but decided to try to get everything we could possibly need for this job - new cotter pins, a fresh differential face gasket plus a few extra tools such as better metal files, a long pry-bar, additional socket extensions and some nice to-haves like Swarfega, gloves etc. I wanted it to be as easy as possible. This would add some upfront cost, but with DIY you own a lot of these things forever, ready for the next job, and to be honest, the price was nowhere near what I expected most mechanics would have tried to charge me so it is likely I was saving a bomb by doing this particular job myself.
There were two problems I could see we would need to get around, as well as one silver lining opportunity. The first of the problems was getting the seals seated correctly, tools existed but reviews were hit and miss, likely due to differentials all having different designs and shapes, so my Dad took to welding his own seal pusher tool based on the information in the video so that we know it would be exactly to spec. The next problem was where we would work, weather in mid to late April is hardly dependable, I do have a carport but the logistics of working in such a space would be fun. I broke out the tape measure and, thanks to a perfectly positioned gate, it looked like we would have just, and I mean just, the right amount of space to get the job done. Unfortunately, this did present a new problem, a drain sat directly under where the axle stands would need to sit, so some borrowed slabs would hopefully get me by - I want to be clear at this point, do not jack up a car on slabs like I did, for reasons I would come to learn shortly.


The opportunity was that we were unquestionably going to replace both seals while in there, it would be stupid not to, so with the other shaft out I had committed to getting that one reconditioned too. As far as I could see there would be no downside to doing this, it didn't look in much better condition than the other side had, leading us to question why it hadn't also been an advisory, but this almost meant we couldn't get the job done in one day. This might sound like a con, but it took any time pressure off of us, the furthest we could really get on day one was the shafts out and it would be pointless to go any further than that, giving us a nice two-weekend strategy for the work ahead. It seemed like the plans were all falling into place and equipment was being collected, and before I knew it, it was time to begin.
Dawn of the first day
Saturday morning, time to begin. I carefully lined the car up so everything would be able to be removed as needed and set about getting the car into the air. This is surprisingly more challenging than you may think, with a traditional trolley jack the Jeep is a little high to begin with - great when you want to crawl under and get a look at stuff, but not so great when you need to lift it even higher. The asymmetrical nature of the jeep's shafts makes it a bit of a pain to jack up further, the short side can really easily be jacked up under the differential housing, but the other side is a bit tricker. I figured I had just enough room by jacking up on the shaft tube, but I would need to get the jack up to its maximum height. I moved the metal grating of the drains away and put the slabs in place, rotating them until they sat as flush as possible with the drive. The short side went up and onto its stand without any problems, then onto the other side. Slowly jacking the car up and almost to the peak, I was met with what can only be described as a small explosion. Upon discovering I was, in fact, still alive, albeit with a fresh case of tinnitus, I took to finding out what the hell had just happened. Naturally, my gut reaction was to immediately let the jack down, but considering it was still up in the air it likely wasn't the source of the explosion, but pulling it out of the way I found the problem.
Remember before I mentioned not jacking up on slabs? Turns out, putting a lot of weight, even distributed across the face of a slab as the jack would have been, is a great way to stress test them. According to the internet, slabs really aren't built for that kind of work, and while they can do it (case in point: the other side of the Jeep was happily sat on an axle stand on a slab) you will quickly find the ones that aren't cut out for it. I wasn't about to use the pieces to try again, they became chocks for the rear wheels and my early start was scuppered - luckily it was Dad to the rescue. He came with a sheet of thick steel as well as a manhole cover to make up for our fallen slab, and with a bit of fine-tuning and adjustment, both wheels were airborne and work could finally get underway.

Not too much exciting happens right off the bat, I've done brake jobs before and so I'm really just stripping away parts I've seen before, taking care and tracking where everything came from. The brake callipers get cable-tied up to the control arms to save disconnecting brake lines (I had an absolute mare with the brakes last time I worked on them, refused to stop binding, so we try to leave them in peace whenever possible!), discs carted away and now we're delving deeper than I've ever been into the driveline. As mentioned previously, the other shaft would be going off to be reconditioned while we had it out, so one side was a little more involved than the other, needing the hub assembly separating from the shaft (the already reconditioned shaft could be removed as a single piece) before we sent it off, so we started with that side. Cracking the shaft loose wasn't too big of an issue, it required a big 'ol breaker bar and some persistence, but it went in the end - what did not go quite so smoothly, however, was taking the three bolts out of the steering knuckle. In typical British style I am, of course, being rather stoic about the whole event, rather than saying it "did not go quite so smoothly", it might be more apt to call it a f***ing nightmare! Simply put, the bolts and the steering knuckle were no longer 4 separate parts but instead had fused into a single lump of metal, permanently fused through 20 years of slow oxidization and having probably never been removed before...
So you start with the rubber mallet and a ratchet - when that fails? Nuke it with penetrating spray, and grab a bigger bar to give you more leverage - no room for a full breaker bar, but the principle of levers means anything longer allows you to apply more torque. When that fails? Ditch the rubber mallet for an actual hammer, even pop to the local hardware shop and grab a different penetrating spray and really start bashing at it - hell, hit the steering knuckle too, anything to pop the rust loose. When that fails? ...well, we were teetering dangerously close to the precipice of quitting for the day, when my neighbour, well versed in the world of DIY too, pops around with a simple suggestion: "You need fire". He vanishes and reappears with a blowtorch (as well as a couple of chisels to hopefully pry between the two faces). So began the cycle, a couple of minutes of fire, a couple of minutes of hammering the socket and bar, a couple of minutes of trying to tap the chisels into the gap - rinse, repeat. I spent part of the day sitting on the Jeep's bumper, just to make sure the prying and hammering didn't push the whole car off the axle stands, we certainly both managed to lift the whole front end a couple of times. No amount of rambling will really sum up how long this took, so as a simple summary: while this was going on, it was mostly not a two-man job, so I started working on the other side, this was the already reconditioned side and had been stripped down recently, so it was an easier job. It took me 30-45 minutes to go from the wheel on to the shaft out, the problem side? The best part of 6 hours.
But after those brutal 6 hours, when you stuck your eye up to the axle tube at one end, you could see daylight out the other end. We had, finally, reached our goal and could wrap up for the day, a successful, if exhausting day. Bruised, cut, coated in a thick layer of black gunge and desperately needing a beer, the work would be done for the week...

")
Small jobs in-between
In the interim days, when we gave up our tools and hobbyist mechanic dreams and returned to the hum-drum of the working week, there were a couple of important jobs to do. Firstly, I took the second shaft to be made anew and, once again, the shop did a brilliant job of sorting it out. Secondly, there was one job I wanted to get out of the way in prep for the following weekend because there was one part that would literally be in the way if left where it was. The track rod/drag link sits directly in front of the differential and in order to do the next part, which would require removing the core of the diff, it would need to be gone or at the very least disconnected at one end and pivoting out of the way. This was another rough job, getting the cotter pin and nut off was, actually fine, but getting the thread to drop out of the hole was another story. Armed with penetrating spray and a tip from the internet I got to work - the tip I received, which was a godsend, was to put the retaining nut back onto the thread but upside down and hit that, to prevent mushrooming the top of the thread. That worked great, between that and using my pry bar against the control arm/chassis it popped loose about an hour later, trivial compared to the nightmare weekend just gone.
Weekend the second - finish in sight
Early rise for me, my Dad is still sound asleep at home but there are a few jobs I can do myself while waiting for him to drive over, including perhaps one of the most satisfying/landmark steps: opening the differential up and draining it down. There was a drawback, of course, I would need to deal with the foul-smelling oil from before, so an old washing-up bowl would have to do the job and it would sit until I could cart it to the local tip. 10 bolts stood between me and stinky success, considering how rough the previous week had been the thought of fighting with these bolts filled me with dread, especially the few barely accessible ones thanks to the track bar, but each one cracks away relatively easily and the goop is quickly drained into the bowl - I can officially see the differential. The next part was important to get right, so rather than progress alone, I spend some time cleaning as well as practising seating the shafts while I wait for my Dad to arrive - the practice is important, that way I know what it feels like when the shaft spline drops into place, and better to practice on the old seals rather than the new ones. Astonishingly, the splines slide into place easier than I could have ever anticipated, and the day was starting off on a good note.


Once ready, we take photo after photo, I even drew a to-scale diagram of how the differential goes together and all of the markings to absolutely ensure we would put it back together the way it came out. Now there ain't nothing to it but to do it. Crack four bolts, carefully remove the bearing caps and store them away then with a bit of persuasion the whole carrier case, bearings and gears all came out as a single unit. After hours of work, we had finally arrived at the job that bought us here: the axle seals were officially visible. The seals would need to be pushed into the differential from the outside to remove them, which was fine because I had purchased a pry bar just for the job! A pry bar that happened to be exactly the same length as the longer side of the axle tubes... Luckily, I had also bought an assortment of socket extensions which when stacked together would reach easily, so I would cautiously hammer on the bars from the outside while my Dad tried to steady the bars on the seal from the inside. It took a little while, the seal would need hitting across all sides and the occasional hit would jump the bar off of the seals straight into my Dad's fingers - not a fun experience, but at least it was over within about 20 minutes. The other side, the shorter side, worked with the pry bar and thankfully its tapered edge designed for, well, prying, popped the seal straight out.
Replacements would go in with a light slathering of RTV silicone on the outside and a bit of oil on the rubber before loosely dropping them in place. Now it was time to break out the tool my dad had made, using the same sockets used to tap in the seals in the video but replicating a seal pusher, we basically had a tool built perfectly to suit the design of the Jeep's differential housing. By slowly working the nuts the tool expands and pushes the seal in, hopefully going in evenly and without putting any strain on the rubber seal itself and... it worked perfectly! We took our time and checked progress frequently, but both sides ended up flush with the housing and we could actually start putting things back together. It may be no surprise that putting the car back together was very much a case of doing the same steps in reverse order, but before we did that everything got absolutely blasted with brake clean, all rusty faces got filed and wire brushed until flat and smooth. Assembly started by carefully putting the differential pieces back in as they came out, sticking a fresh gasket onto the face and putting the cover back on before dumping the appropriate amount of gear oil in (which handily is basically just "fill until it starts to leak out a bit"). Shafts in and things really started to speed up - everything got torqued to spec and, having seen the horrors of getting it apart the first time, everything gets a generous helping of copper grease. The only slow part was repeatedly going on our phones to find the torque spec of the next bolts. Given the rigmarole of getting it disassembled, it may be shocking to admit here that we were lifting the Jeep into the air to remove the axle stands and returning it to rolling on its own wheels after a pretty much uneventful day, almost worryingly so! The only scary parts included trying to torque the shaft nuts to their ungodly specs without pulling the car off of the stands and trying to get the car off of the stands without repeating the slab explosion.


Doing a job like this, or really any job on your car can be quite daunting. Ultimately, you're making changes to over a tonne of metal that can travel at high speeds and potentially cause damage to you and the people around you - it is to be taken seriously, so after I do something like this I build my confidence in it slowly. First, a lap around the estate, no more than a minute or two at sub-30-mph speeds before reinspecting everything. Then, a larger loop, maybe to the local shops and back, you get the idea - each time a larger and larger drive until you're happy that everything went back correctly and nothing is going to give out on you. Aside from a slightly weepy differential that just needed tightening down further, everything had gone perfectly! I'm still a little in awe that the car that spent a week on axle stands in pieces spread across my garage and conservatory is actually back together, at my own hands no less! I've always loved DIY and working on cars, so it is nice to grow my confidence in these things further and to go through a job that seemingly no "professional" wanted is a great little booster to what I now know I can do - so that's it, the daunting job no one wanted was turned around in two Saturday's of graft in a cramped space in my carport. Maybe this will serve as an encouragement to you too, it's hard, dirty work, but it is rewarding when it all goes back together to say you did it yourself and I dread to think just how much money I would have lost had I not been convinced to do it myself...