
This is 'Try something new...', a
series of articles encouraging you to get out there and, as you may have guessed, try something new. What that thing is may vary wildly,
sometimes we will be well experienced and other times we will be a
beginner trying it for the first time just like you! This article looks at the fundamentals of map reading, and will hopefully get you to the point of being a capable navigator just by practising with a few easy tips...
Map Reading is an incredibly useful skill that can really make getting around so much easier. Sure, in the modern age there are so many tools that will do the work for you, but in those little black-spots where network signal and GPS still cannot reach having the knowledge that you can always get yourself out of trouble is a wonderful safety net. I have encountered many people who struggle with map reading, or will just tell me they are completely incapable of it, but I think there are a few techniques that can help people get past that first hurdle. I won't be doing a deep dive into the skills required for orienteering (orienteering is the competitive sport of navigation), in this, I will just be focusing on the basic concepts needed to get around using a map; however, should you wish to go further then this will give you all of the fundamentals required to get into orienteering.
This is written from the perspective of a person in the United Kingdom, so for some context when I mention OS maps I am referring to the Ordinance Survey - an organisation that produces topographical walking maps, in both paper and digital form, of basically everywhere on these isles. So you may need to do a little research to find your regional equivalence, or if you cannot find anything I recommend openstreetmaps.org as a start point, which generally does a better job than its big-name counterparts of having marked walking trails, topography and more.

What you will need:
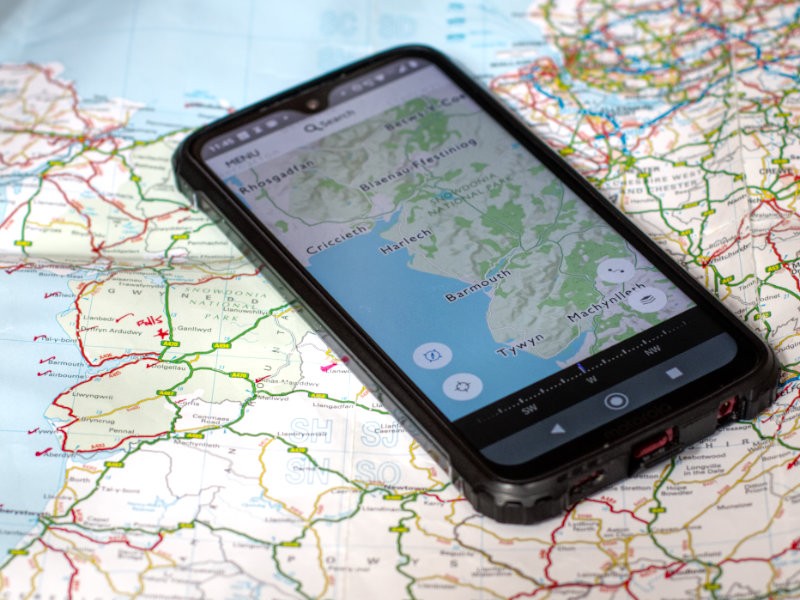
- A map (shocking I know) - in the interests of simplicity I recommend the OS maps app or a browser-based map but I will be discussing paper maps including typical road maps and GPS devices
- A compass - this is optional but can make the process a lot easier. Small but effective compasses can be very cheap, I keep one clipped to my bag and generally forget about it until I need it. If you happen to use an app that does not allow the map to rotate then being able to quickly find north can be very useful
Why would I want to map read?
As someone who works in software development and knows about all of the wonderful technologies available to us in this modern world, I appreciate it can be easy to dismiss traditional maps and the skills of map reading as a relic of a bygone age. However, there are to this day still plenty of spots where all of the phones in my travelling party have lost signal or dropped to that little E/H that may as well be none existent. This becomes especially true if you plan to explore dense forestry, mountains and gorges or valleys, often as you end up in places with thick canopies or areas that are flanked on both sides our modern technology just cannot cope. Beyond signal, batteries die and bugs occur, so having something to fall back on is a valuable thing; I tend to travel with a GPS device and a phone and I use these in tandem with more traditional devices.
In the real world, you will probably find yourself using an electronic device to get around and then using your map reading skills to fill in the blanks when you need it. There have been several occurrences in my travelling history where this has come in handy, so many walks where I have started off using things like OS maps/Google Maps to start my navigation, and then when my signal takes a nose-dive I continue navigating using the app until the signal comes back (should it ever). It is important to note that map reading is not a skill limited to paper maps, if the app you are using cannot find your location then you will still need to be able to map read to navigate. You don't want to end up that person forced to cut their day's adventure short because your mobile phone provider has a black spot and you cannot figure the difference between a contour line, a pathway and a boundary.
Plus, I have plenty of experiences of using manual navigation because of signal black-spots and I am just talking about my adventures around the United Kingdom, a small landmass that is generally considered good for phone coverage. If you plan to travel the sticks or outback in larger countries then you may find yourself in miles upon miles of signal dead zones.
What should you use for navigation?
Having back-ups to your back-ups is always a great idea, but for a days trip, I won't criticise anyone for not wanting to buy a paper map, especially if you only intend to follow clearly marked trails. In dire straits, you can usually retrace your footsteps or navigate via your natural sense of direction. However, I do try to always have a few phones in our walking group and my GPS whenever I remember to carry it, not ideal as these are all signal/battery-based but there is enough redundancy that we should never have a problem. If you do go down the electronic-only route, remember to download the maps for offline use before you head off because at least this mitigates the signal loss issue to a degree - but you will still need to learn to read the maps if location services fail. Plus a GPS is a great option because unlike modern phones it offers interchangeable batteries, which often last far longer than phones, so you can always carry extras; a battery pack for charging can also be carried to keep phones alive. As a final fail-safe, try to keep a screenshot of your walking route as a last resort just in case the app you are using decides to completely fail on you.
So to answer the question of what you should you use, I would recommend you tailor your options to the type of exploring you are doing. Single-day walk, primarily on well-marked trails? A couple of phones between you or your group, or a phone and a GPS as a fallback should be plenty but also take the precautions mentioned above to avoid getting caught out. If you are going on a multi-day route or planning to spend a lot of time exploring the paths less trodden, then buying a paper map should be one of your top priorities.
Symbols, Symbols, Symbols...
So you open up the map and there is a whole heap of hieroglyphics staring back at you, now what? Hopefully, your map has a key or legend - in paper form, it is usually a box in one of the corners or on what would have been the cover before you unfolded it, that details what you are looking at, in an app it will probably be tucked away in a menu somewhere. Rather than get overwhelmed trying to memorise them all, remember that the icons used are generally self-explanatory and for most key landmarks you shouldn't have any issues. Truth be told legends often provide so much information they can make maps feel a little overwhelming, so let us focus on decrypting some of the crucial features.

To begin with, some parts should be immediately obvious: roads, rivers and big green blobs to represent the countryside. Some maps like to use light blue for rivers and a darker blue for some roads so make sure you recognise the difference. Next, we need to understand our lines, and you will probably need to consult the legend to really know all of the differences. Again, don't do a deep dive into memorising all of the details, just know the difference between a road, a train line, a path, a wall and a contour line as they are all often just thin black lines with subtle differences.
Speaking of a contour line: Mountains, valleys and hills can be a little trickier to understand for the uninitiated, some maps mark the highest point with a symbol or even the peaks name but this is not always the case, so getting your head around these lines can be valuable. Contour lines denote a change in elevation, with the distance between these lines denoting how quickly the elevation changes. Contour lines that are tight together in quick succession mean you are approaching a very steep slope. Contour lines will typically have lighter and darker variants, with the darker ones marking round numbers usually marked on the map or explained in the legend; this is not always the case, some use shading to help denote the direction or have markers for inclines/pits etc.
One of my main complaints about the free version of OS maps is that it does not put these numbers on the contour lines, most likely to encourage subscription, but this does mean you cannot really judge the direction of a slope at a glance. In order to figure out which direction contour lines go in this case, you may need to look to other environmental clues such as streams and lakes (which will typically be in valleys rather than atop mountains) but even with this, it can be difficult to judge accurately.
UPDATE (26th September 2020): This has since been rectified and now when you use the standard version of OS maps, height indicators are included on the contour lines. This is a massive improvement in my eyes and one I am very grateful to see, below is the original screenshot I had in the article and then after that is an updated version with these contour height markers. I also find the updated aesthetics clearer all around so a great update from the OS team.


My recommendation for getting your head around the symbols is to find somewhere on the map you are very familiar with and see what it looks like. If you can translate a place you know like the back of your hand into its map counterpart, it will make getting how the map works into your head that much easier.
Finding your location in the field (sometimes literally)
The first step in navigating via a map is knowing where you are. Now in 99% of situations, I would hope you would know your general location to within a few miles; ideally, you planned your trip so you know your starting point, or as mentioned above you were using a navigation app until your signal dropped/the battery died. Before setting out on any journey, you should take a moment to view the place on a map so you have a good overview of what to expect.
Let us think of your location on two levels, a macro-level (that is your general vicinity) and a micro-level (your exact location). To figure out our macro location, let's use a hypothetical from one of my often visited places we have written about on Love Our Adventures in the past; this is something you can try for practice with an area you are familiar with too. The reason I chose this example was that I found it on a whim while browsing a paper map for places to visit one day, it said nothing but 'waterfall' and I am so glad I decided to visit! Hopefully, you planned your walk on the previous day but if you didn't and this was a completely on a whim visit at the very least you may know towns you passed through or the route you took to get to this walk. Truth be told, you never want to find yourself in a position where you don't know at least your rough location, but if that happens there are hopefully some elements we can piece together.
For the sake of an example, I am going to pretend I don't know the name of where I am or really any details about it, we can say we just went out for a drive and saw somewhere pretty, so pulled over and went for a walk but that would mean I hopefully remember a few details from the drive. Let's say I remember passing the "Welcome to Ganllwyd" sign - great! I know my macro location then, but where is Ganllwyd? I know it is somewhere in North Wales but that is one small town amongst many... Well, as I often do, I started out from the town of Barmouth and all I need to do is recall general landmarks between my start point and endpoint. Landmark navigation is essential to figuring out your position and the best part is that they usually stick in your memory. You should also remember a landmark isn't just a statue, a natural beauty spot or a notable building, but when navigating it can simply be a turn in the road, a recognisable piece of terrain or a business/service building that stuck in your mind - anything that can be clearly seen on a map can be considered a landmark for navigation.
So what do I know and is there any landmarks? I have a start location and the town I ended up in, I also remember bits of information from the journey - I left out of Barmouth and passed Barmouth Bridge, and followed the river inland. I pretty much followed one road that snaked around, but I cannot recall much until turning left at an island. There were mountains around but none were particularly noteworthy, and I passed other towns and businesses but I don't recall any of the names. It might be that these are the only notes you can remember, but this is probably enough to find your location so we should run through it using the OS map app.
First, here is our start point, and we can see Barmouth and the bridge across the estuary so we know which road to follow:

Having followed the road inland for a while here is the island that I mentioned turning left at (remember, this map is north oriented so you have to rotate it in your mind):

Following this road north for a while I eventually found the town of Ganllwyd:

Here is an important note on OS maps, but it can also be an issue with any digital map: I happened to be zoomed in at just the perfect level where Ganllwyd was not visible on my first pass, see this example where the X marks where Ganllwyd should have been at the middle zoom level (and zooming out slightly (left) or in slightly (right) caused the town to reappear):

Now obviously this could have been a problem, but using our landmark navigation I knew I had gone too far when I saw Llyn Trawsynydd as this is probably the kind of landmark I would remember passing, plus it felt, using the previous distances as a rough guide, as though I had scrolled way too far along that road. Landmarks can be useful not just for the things you have seen but can let you know when you are map reading in the wrong direction when you see landmarks you should have probably noticed. If I had zoomed either slightly in or out this would not have been a problem, but this can be a common problem with small settlements that only appear when zoomed in.
With that our macro location has been found, so now we need to try to recall our hypothetical travels so far, much by using the same method only now we are looking for landmarks on the walk. What landmarks do I remember from the walk? Well, I crossed the road from the car park and passed through a gate near a bridge (which we crossed while driving, so I know to head back up the road I came in on) while heading up a country lane with the river on my left. Almost all of the walk was uphill but none of it was particularly steep. I passed the farm entrance, as I happened to remember saying hello to a loose sheep who scarpered back into the farm. At some point, I broke off from the road, crossed a bridge over the river, headed upstream and saw a waterfall. To round this example out, let's say I continued past the waterfall following the path and I am now stood at a cross-roads (with no signal, hence the need to find our location manually). You can use this landmark-based navigation as long as you want, piecing your walk together from what you can recall until you find your current location. Using the clues detailed above, here is the route I mapped to what I believe is my location:

Funnily enough, our memories can be flawed or miss bits and using the information I mapped out above this walk is slightly wrong but it does get me to the correct location and that is all that really matters. By chaining together any little details you may have about the route so far you can quite easily figure out where you are on the map. But how can you be certain? Ideally, there is a nearby landmark that will confirm your location, but if not the paths themselves can hopefully be of some guidance; in our previous example we were stood at a crossroads, so finding one on the map where we expect it to be is a pretty good clue, but if we didn't have that, what can we do? Well, while not perfect paths will generally curve and turn on the map roughly as they would in real life, they should also show alternative paths and crossroads, so consider picking a route and following it for a while and seeing if it lines up with the map you have with you. Going back to our example, we are stood at the crossroads but we want to be absolutely certain we are in the correct path? Well, we can see that if we turn left there is a short path that circles around and will bring us right back to our current location via the waterfalls we saw earlier. A short detour, but by using it we can absolutely confirm that the location we have is correct! Of course, you might not have such a perfect option especially if you are on one path with no joining paths, but find something on the map nearby that stands out and see if you can find it.
Navigation using a map
So you have a map in hand and know where you are, now what? This is probably the part people struggle with the most, actually tracking a route can get confusing if you aren't experienced but it is the kind of skill that comes with practice. The first step is to orient the map in a way that is useful to you, people have different preferences usually between keeping the map oriented north and navigating that way versus orienting the map the way you're facing. Keeping the map in the direction you are heading is the simplest way to do it, as you don't have to continuously translate your direction to the map's north orientation. Do whatever feels most natural to you, but if you are going to navigate with an app or digital device make sure it allows for orientation as certain ones do not (OS Maps does not rotate, but if you keep your phone flat you can rotate it without triggering accelerometers, or turn off your phone's auto-rotate feature). Once you have mastered navigating by rotating the map you can practice using a fixed north map later, should you want to.
Next, you should make a decision as to whether you wish to continuously track yourself on the map or if you would rather do it periodically; keeping the map out makes navigation easier but can get incredibly cumbersome, especially with an A3+ sized paper map, or it can be lethal to your device's battery if using something electronic. Whichever method you take, as you had been before you will once again be navigating by landmarks, but from this point forwards you will now be memorising the landmarks on the map and then finding them in real life. Between you and your destination, there will hopefully be a number of distinct markings on the map, anything from a distinctive curve, corner or s-bend in the road, a joining path or something more substantial like a natural feature such as a stream. If you are going to pack the map away, make a mental note of 2-4 upcoming landmarks and roughly how quickly you will encounter them - if, at all possible, you can make this easier by trying to pick landmarks equidistant from one another.

It is important to know roughly how long you will have to wait before encountering a landmark, this may be difficult if you are new to map reading but you can make a solid estimate based on how far you have walked so far and what you can see on the map. The map will almost always feature a scale, but unless you have something to measure with then use your fingers widths to judge how far you have travelled recently. You only need to make a rough guess to avoid wandering for far longer than you should. To make your estimate, either use from the start of the walk till now or preferably a recent memorable landmark to your current location, roughly measure the distance on the map with whatever you have available and see how the distance compares to your first upcoming landmark. If its the same width, it will take roughly the same amount of time assuming the conditions are the same, but thanks to your new-found understanding of contour lines and topography you can make a basic estimate of the upcoming difficulty of the route.
With your map oriented, your route selected, landmarks memorised and rough distances calculated you have everything you need to begin walking. Even if you choose to pack your map away as a beginner you should consider breaking it back out often, especially if you encounter a landmark you were not expecting - did the map just omit that landmark or does it match something on another route? In a situation where you have got yourself a little lost it may be tempting to pick up the pace as you panic a little, but if you do this make sure you have factored it into your timing estimations: if you have idly sauntered up the hillside with plenty of photo and snack breaks to start your walk, but are now Olympic power-walking your way to the finish line you could easily half your timing estimates.
The reason knowing your timing between landmarks is important is so you do not waste too much time heading down the wrong paths; if you estimated you would reach your first landmark within 10 minutes then by the 15-minute mark you can be fairly sure you are on the wrong path.
Practising map reading
There is a lot to be said for practising map reading, as mentioned before I believe it is a skill a lot of people struggle with and something that can continue to allude people even after trying it. There is a lot to be gained from going somewhere you already know, but navigating it with a map. This can give you the security that you will never allow yourself to get lost but can spend time finding your location on a map and gaining a familiarity with how map reading works. You should spend some time learning how topography translates to the real-world counterpart and how major landmarks become symbols once on paper.
Perhaps the best method for learning to map read is to go somewhere you are not familiar with, but in the company of someone who knows it well; this is perfect as it gives a real-world practice of being lost with a map but with that same safety net mentioned previously. If you are the teacher in this scenario, I whole-heartedly recommend this method with the added advice: let the newbie map reader make mistakes, and rather than correct them see if they can successfully catch and correct those mistakes. Obviously, keep them safe and don't let them spend hours chasing their tales, but let them go 10 minutes down the wrong path before asking some leading questions, e.g. "What landmark are you expecting to see next?". Going the wrong way is just as important as successfully navigating when it comes to learning to map read.

Of course, map reading is not limited to hikes and being able to navigate as a passenger in a car is just as useful a tool for those moments where the GPS signal fails us. A second person is a definite requirement for practising navigating on the roads as I do not recommend attempting to map-read or use an app while driving. You could navigate for a friend on a long journey as a means of practice, and again if they already have knowledge of the route it is an excellent safety net.
As a fan of all things cartography, I will admit this is a skill that is best developed in the field, for as much as I love to explore a good map without its real-world counterpart in-front of you it can be difficult to translate the mish-mash of lines and coloured blobs into something that feels real. If you really cannot get outside but desperately want to brush up your map reading there is a, admittedly a little strange, way to practice that can be done on a computer or even better using two digital devices (or even a paper map if you have one to hand). First, launch Google Maps and navigate somewhere, ideally somewhere you don't know particularly well, pick a starting location and an ending location somewhere a little distance from each other and plop yourself down into Street View. While Street View doesn't map a lot of walks (yet - their library of walks is ever-growing), road navigation is still a good way to practice map reading and in a lot of ways is considerably easier than when you are out in the sticks, so this is a good way to get some of the basics mastered.

Once in street view navigate around a bit, not necessarily in the correct direction, until you are a fairly good distance from where you originally started. Treat this as though you were actually travelling so observe landmarks and try to ignore Google Map's preview window in the corner if on desktop (or cover it entirely). Next, you can either open up maps in a second tab window or on another device and start locating yourself and using the steps detailed above to not only find your current location but navigate to your final destination. This may all sound like an absurd way to learn but the core concepts totally work as a means to practice your navigation. Who knows, maybe you will get so good at this you could become a top-ranked GeoGuessr player!
The point to emphasise here, regardless of the method you choose, is that you the only way to develop a skill is to repeatedly practice it. In an ideal world, you can find a way to practice in real circumstances as outlined above but that is not always possible so through some creative means you can get your map reading mastery up. Even after just a few attempts, you will almost certainly find yourself improving and getting more confident with your map reading skills. All you need to do is get out there, get to understand the map you have available and find the techniques that work best for you. Then, on a future road trip when the driver asks for someone to navigate you can step forward safe in the knowledge that you can map read with the best of them!
