
In Staying sane during the Coronavirus lock-down,
I talked about how important it is to try to stay productive during
these weird times and now I decided to take a weekend to heed my own
advice and capture some of the beautiful wildlife that often comes to
visit. While I didn't manage to meet my challenge to capture a bee or wasp covered in pollen (it is a little early in the year and most of my garden isn't quite in bloom yet), I did have a fun time in the sun with my camera.
So as you head out into the garden you must remember: not all great photography needs a grand adventure to proceed it, sometimes you just need to make the most of what you have. Our gardens may be a limited window to the great outdoors but we should still do everything we can to make them a photography hub. I am going to break down some tips that you can use to take some back-yard snaps that you can be proud of; this list will be a mixture of general advice and things you can do to in the future to make your garden an even better space to capture some wildlife.
1. Study your space
Before we begin with the camera it is important to get to know the area you will be shooting in and make sure you know it inside and out. You may think that it's your garden and no one has a better understanding of it than you, but the insects and animals that may frequent your green space have a vastly different world outlook. The critters may even come to surprise you, in my garden, there is a handful of flower-beds full of gorgeous colours and sweet-smelling plants, but you almost never find the bees there! They often congregate around some unassuming bushes in one corner of the garden, often with tiny flowers that you wouldn't think would be so popular. This issue also extends to the birds in my garden, there are several bird-feeders in open space but it is actually a small feeder nestled under a cherry-blossom tree that tends to get the most visits; I can only assume the smaller birds feel safer under the canopy.
You can also try to look beyond your own garden for some extra focal points. Whilst always being aware not to point your cameras at your neighbour's houses, keep an eye for spots that may attract wildlife; two doors down from me are some seriously tall conifers that attract all kinds of Magpies and Corvids - If I can I try to catch them mid-flight with blue skies behind them.

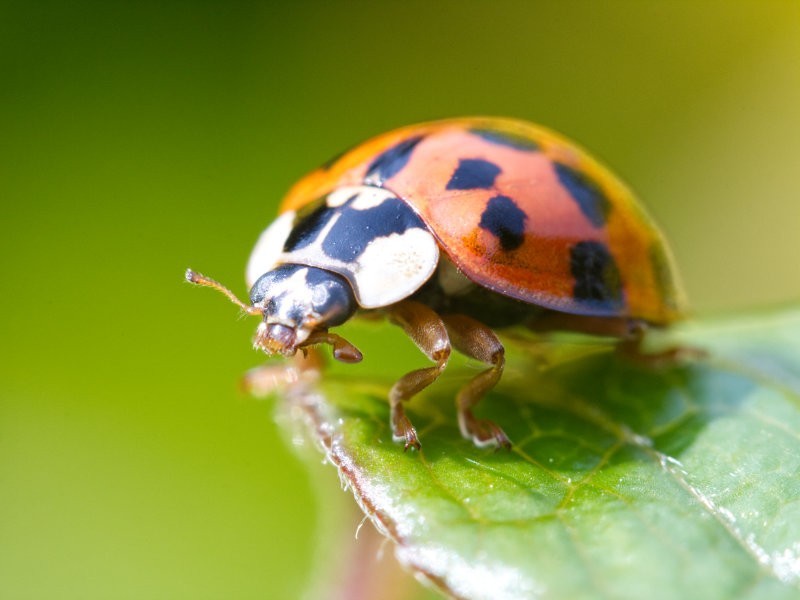
If you really want to get in and up close with creepy crawlies then you seriously need to get exploring in all of the nooks and crannies of your garden, find the routes that the ants and bugs frequent. As an example, there is one bush in my garden that both shield bugs and ladybirds absolutely love, so I know I can always get a nice macro shot of them at pretty much any time of day. It can also help if you have a few bits of slowly rotting wood dotted around as these are absolute magnets for various woodlouse and other little bugs.
Finally, it is worth planning how you want to frame your shots: when I shoot birds I try to pick a spot where I can catch birds approaching the bird-feeders, but I try not to get the bird feeder itself in the shot. On the contrary, I try to make sure I can always see the birdbath in my garden, as it often makes for some funny photos when the pigeons come down to spruce up. Ideally, you will be able to find a place in your garden to set up a comfy chair that has a good view of everything you want to capture, with all of your gear to hand. Speaking of gear...
2. Get your gear right
Depending on the type of photography you're planning on doing it can vary your gear a lot, but I am going to assume you want to get some interesting photos of wildlife and insects as they will be the easiest to get some spectacular shots of, even as an amateur. The upshot here is to get started you may only need 1 or 2 lenses and you're away! It is also worth playing with your phone to see what you can get out of it; while your phone maybe won't capture the most amazing close-ups, it will still be a good starting out point and maybe you will discover a love for photography that will lead you to your first camera purchase.
Starting out with the wildlife, then a zoom lens will be your best friend - if you're looking for something flexible while not breaking the bank there are plenty of options, I use an old 55-250mm zoom that has kept happily snapping for years. If you're unsure what to get and want something versatile, my advice would be something with a reasonable range of zoom (not prime - wildlife has a habit of moving so that variability in zoom is essential) and ideally featuring both image stabilisation and auto-focus. When you're starting out in photography, not having to worry about your focus and having the lens assist with stabilisation at higher zoom can be a blessing; if you don't have stabilisation then a tripod is worth the investment and a good tripod need not break the bank.
In order to get those amazing photos of insects, you're going to need a macro lens. I use a 60mm Macro that works well, but to really get up-close and personal I recommend looking into extension tubes - these sit between the camera body and lens and allow you to focus even closer than you would normally. There is, of course, some trade-off, as extension tubes may cause distortion on the outer edges of photos at extremes, but used sparingly they can be very powerful whilst also being surprisingly cheap. Try to get a small set of different size extension tubes, turn off auto-focus and set your macro to its closest setting and view the world in incredible detail!

Essentially you have everything you need to get started, but there are a number of extras you could grab if you want to experiment or get the most out of your photos. When shooting macro photography, you may want to increase your aperture and keep the shutter speed high to capture fast-moving insects, so a flashgun can help keep everything well lit. Like with all realms of photography, filters can be fun to experiment with and a lens hood can help to control the light and elements from disrupting your photos. You can play with most any photography accessory as though you were out in the wilds, but as I mentioned at the beginning you really only need a couple of lenses to get you started.
3. Pick a spot, be patient
So you now have your gear lined up and a good idea of what you have to work with, it is time to get out there and start capturing nature in all its glory; of course, if you're anything like me the second you grab your camera and head out the garden will instantly empty of any wildlife. This is where being patient comes in, pick a spot where you can monitor all of your wildlife 'hot-spots' identified in step 1 and get comfy - no one is expecting you to lie in wait in a camouflaged bivouac, get comfy with a drink and some snacks and hopefully, you've picked a nice warm day to make the most of.
My strategy is to pick a spot where I can monitor for bird activity easily, then periodically tour the area looking for all the lovely bugs and bees that come to visit. Having your photography gear close to hand is also important, I typically keep my lenses set up and ready to go at all times so I can hot-swap them on the fly. The last thing you want to be doing is running indoors every time you spot something worth snapping because if it is living and breathing you can guarantee it won't be waiting around for you. The only real downside to keeping your lenses with you and swapping them outside is the potential for dust and dirt to get on your gear, however, being able to clean your lenses and sensor properly is a useful skill for every photographer to have, so consider it a potential learning experience.
Sit back, relax and wait for the world to come to you. Try to roam around periodically for your macro shots to break up the monotony but just generally enjoy the day. I promise with a little bit of patience you'll have a reel of photos to be proud of.
4. Improve your odds
If you've tried a few times and not had much luck, don't forget you can enhance your odds of capturing what you're after with a few small changes to your garden or outdoor space. Everything from adding birdhouses and feeders to creating a wild section will help to fill your garden full of wildlife. Try a couple of feeders in two different locations to see what you attract, and put some houses up high where the birds are most likely to feel safe. Offering a variety of food is likely to attract all different kinds of birds, I tend to see the most success with mealworms and fat-balls. Bird-houses may not always see success but I have always included them in my back-gardens, my only advice is to be careful not to position them too close to your bedroom window unless you enjoy the dawn chorus from hungry chicks.
You need not stop at just that either, feeding tables can be filled with a variety of food that may attract more than just birds, with the local squirrels coming to visit often too. We add a halved coconut and some nuts and the squirrel is kept happy and returning often, although he has taken to digging holes all around the garden, so be prepared for a lawn full of divots. The only drawback here is you're likely to need to craft your feeding areas in a way that stops the pigeons from eating absolutely everything they find, some of our feeders have been modified to give the smaller birds a chance to get their share.
A wild area is a great addition to any garden, and it doesn't have to be a massive forest to encourage the insects to move in - in fact it can be as big or as small as you want it to be, and really doesn't need to cost much. The simplest of wild gardens can just be a stack of old wood for spiders, beetles and woodlice to move into, for a little bit extra you can stop mowing the area around it or even sow wildflower to give the pollinators something to enjoy too. These core features are all a wild garden needs, but if you wish to expand further there are plenty of options including purpose-built houses for insects and bees, even adding a hideaway hutch so hedgehogs have somewhere to live too.

So there you have it, with some simple changes you could be kept entertained with your camera for hours without ever setting foot beyond the perimeter of your house! Even if your green-space isn't the most appealing at the moment, with a bit of effort you can make your garden a more welcoming environment for local wildlife, and a more exciting place for you as a photographer - sounds like a win-win to me. Hopefully, this will inspire you to still keep snapping away merrily with your shutter, even at times where you only have your garden for entertainment. You garden can be an exciting place full of life, and now is the perfect time to discover all it has to offer.
